What is Tiling? How to the tiling? who are the Tiling? All Info
- 30 May 2024
- 1267 View
- 5 Minute Min Read
- 1 Comment
What is Tiling? How to the tiling?
Tiling is a skilled job that requires a good amount of planning, but we are here to help you get the best finish. Whether you’re tiling a full bathroom, a kitchen splash back, the shower floor or any small areas that require more skill such as a fireplace, we’re here to give you the best advice & information on how to tile that will help you achieve a great result.
In this blog, we’ll take you through all the important things to consider when planning your tiling and how to tile. All from prepping the surface, to the types of tools you’ll need and the different methods for tiling the floor, walls and other areas of a project.
* Do you want to get the definitive guide to cutting and laying tiles? Click here and download it for free.
1. How to tile
2. Tools Needed for Tiling
3. How to Tile According to the Room
4. How to lay specialised tiles
5. What are the different tile patterns?

HOW TO TILE
STEP 1: CHOOSING THE MATERIAL
Tile is one of the most popular materials used in both kitchen renovation and bathroom renovation.
In recent years, its popularity has in fact continued to grow, becoming a frequently sort after material in all areas of the house. Due to its cost-saving potential and ability to rejuvenate a room with its beautiful colours, patterns or textures.
When it comes to deciding on the type of tile you want, it can often be a difficult decision, with an array of different materials, each with their own benefits & disadvantages.
It’s also important to think about where you plan to place your tiles. If you are planning on tiling your hallway or kitchen, these are areas with a lot of footfall and therefore require a material that is durable.
STEP 2: CUTTING CERAMIC TILES
When cutting your tiles, depending on the material you need to cut you’ll need to use a tile cutter either a manual cutter or an electric cutter.
Typically, manual cutters are used for cutting standard ceramic and porcelain tiles. With electric cutters used for natural stone and more extreme tiles such as 20mm porcelain.
STEP 3: PREPARING THE SURFACE
Before you start, it’s important to make sure the surfaces you’ll be working on are clean, dry and most importantly flat.
If you’re replacing wallpaper for tile, first, strip back the wallpaper to the plaster. Remembering to fill in any holes or cracks that you find with a suitable filler, then coating with primer. Once this is completely dry, you are ready to start tiling!
STEP 4: MIX THE ADHESIVE
One of the most important parts of learning how to tile successfully, is in getting the adhesive mix right. It’s important to know how to mix adhesive correctly in order to achieve the strongest bond possible and a long-standing installation
An improper mix of adhesive may cause issues to your installation or can even halt the entire project, causing tiles to become dislodged or uneven.
When it comes to mixing your adhesive, the best advice is to read the instructions the manufacturers put on the bag. There are many different types and brands of adhesive, which all have varied instructions and measurements to achieve the perfect consistency for their adhesive.
When mixing, continue to mix your adhesive to reach a thick consistency, similar to peanut butter.
You want the mix to be thick enough to apply to the wall without dropping too much. While still being workable enough that you can manipulate the tiles a little after applying them to the wall.
STEP 5: APPLY THE ADHESIVE
When applying the adhesive, it is essential for there to be minimum 85% total coverage beneath a tile for dry area placement (such as dry floors, fireplace etc.) and 95% coverage in exterior and wet areas (such as showers, bath surrounds etc.).
It is also important to remember when learning how to tile, when applying the adhesive, to comb it in straight lines using a tile trowel.
Applying the ridges in straight lines not only allow the adhesive to collapse more easily when laying your tile. This also helps to remove more air from the adhesive, thus ensuring a stronger bond between the tile and adhesive.
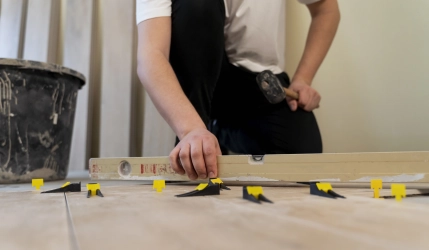
STEP 6: LAYING THE CERAMIC TILE
When it comes to finally laying your tile down, make sure that you ‘back-butter’ your tile with adhesive. Back buttering is extremely effective in increasing the bond of the mortar on the floor to the mortar on your tile.
Particularly when working with large format tiles, this also ensures a stronger bond to the tile & substrate.
Sıkça Sorulan Sorular
-Question 1
+Ansever 1
Advice Article: What is The Flooring? How to the Flooring? All Detail
Advice Article: Home Renovation and Decoration Company


Would you like to rate this article?
There are 58 ratings: Write Ratings 5